
Du kannst diesen Artikel auch auf Deutsch lesen.
Creating a multi-signature wallet with the BitBox02 is easy and secure. Due to multiple unique features, such as on-device registration of the cosigners, the BitBox02 is the ideal hardware wallet for multisig wallets.
There are various specialized power-user wallets available for this purpose. In this guide, we show you step-by-step how to create a 2-of-3 multisig setup with three BitBox02 hardware wallets and Sparrow Wallet. You can read more about Sparrow Wallet and how it works with the BitBox02 for a regular (single-signature) wallet in our previous blog post Peek into Bitcoin internals using Sparrow Wallet with your BitBox02.
Sparrow Wallet is used to create the multisig wallet, prepare transactions, and coordinate signing them. Because the BitBox02 devices create the private keys and never reveal them, you don’t need to trust the Sparrow desktop wallet. When you send or receive Bitcoin, the BitBox02 also protect you because you can verify all relevant details directly on their secure screen.
Sparrow Wallet
- Install and open Sparrow Wallet. You can find it here: sparrowwallet.com/download/
Create the wallet

2. Chose File → New Wallet to create a new wallet

3. Sparrow asks you for a name for the new wallet. Chose one and click on Create Wallet

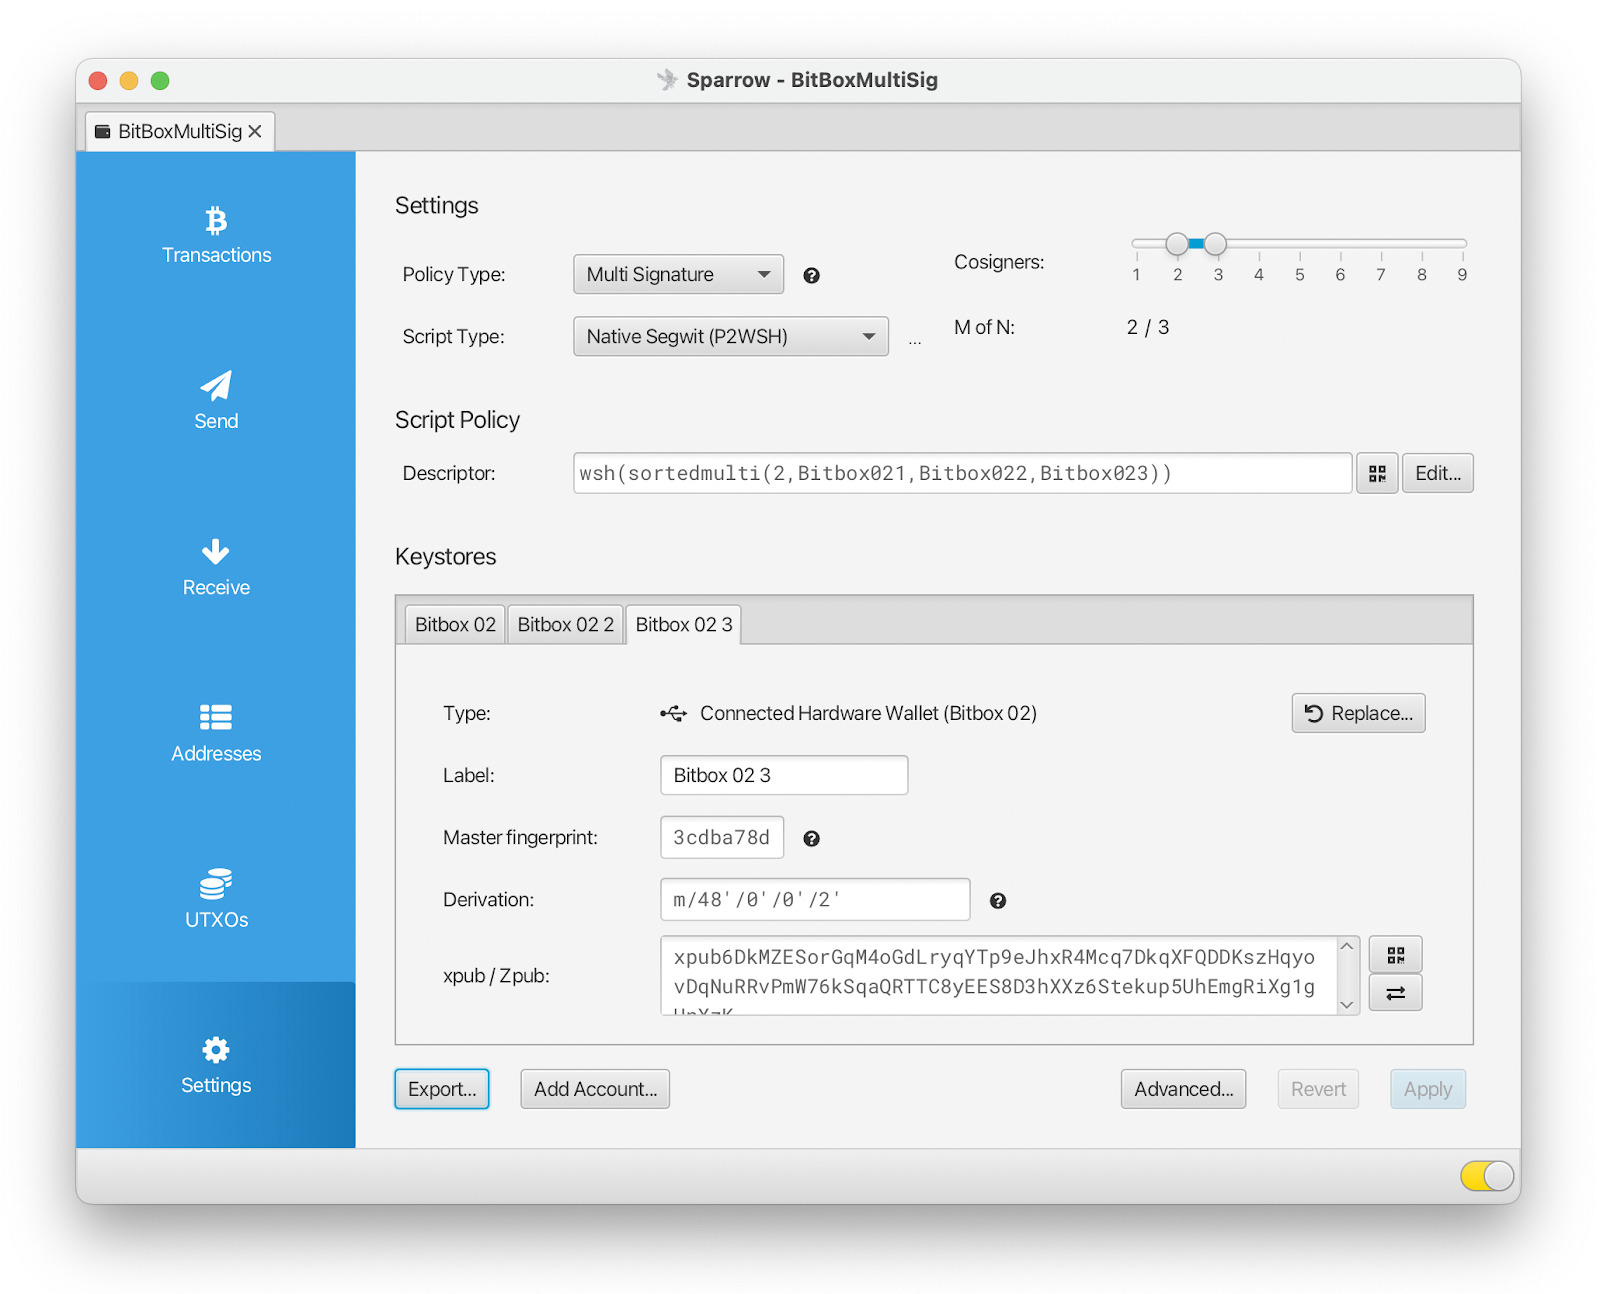
4. Sparrow will show you the Settings page next. Here you have to change the Policy Type to Multi Signature. You can also change the amount of cosigners and script type, if you want (although Taproot is not yet supported for multisig). In this example we will go with the default native Segwit 2-of-3 setup.

5. In the lower part of the settings page, you add the individual hardware wallets. Plug in the first BitBox02 now.

6. Click on Connected Hardware Wallet in the Keystore 1 tab and unlock your BitBox02 by typing in your device password.
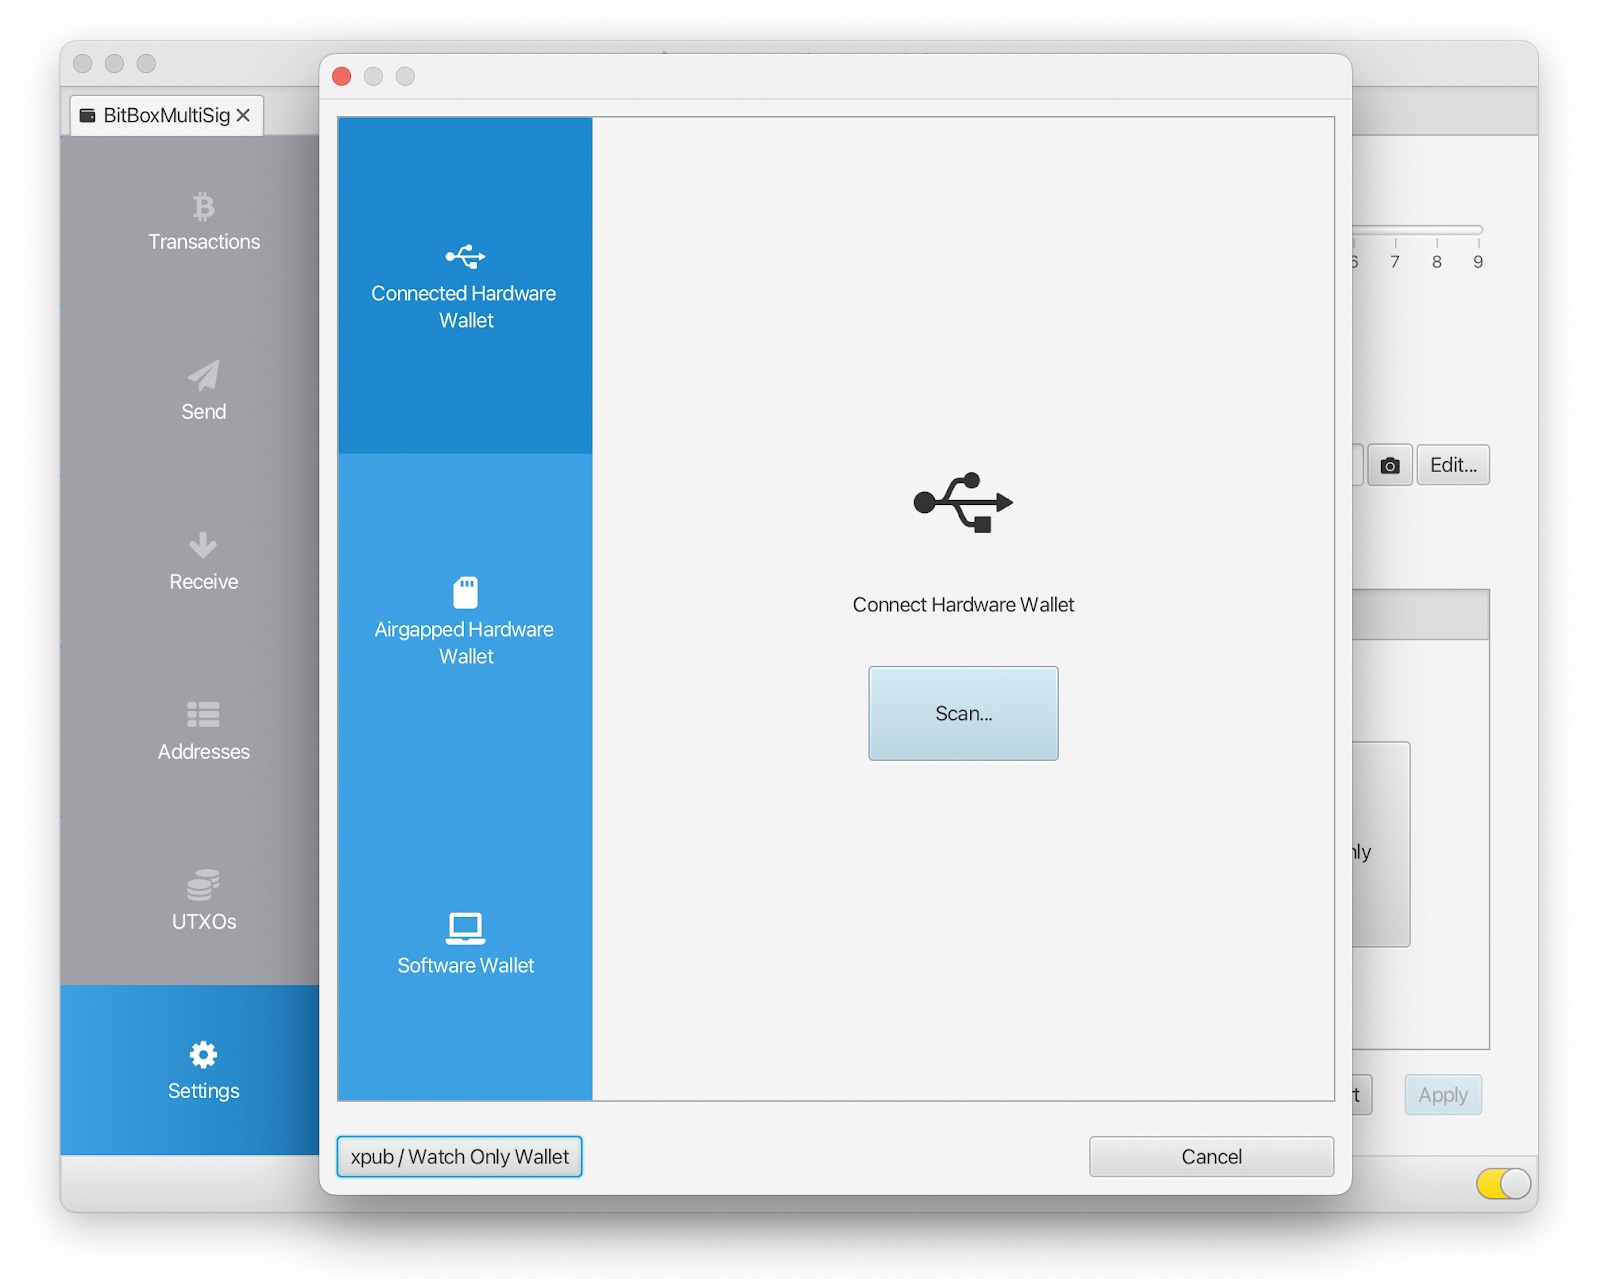
7. Click on Scan... on the following page.

8. Sparrow should find your BitBox02. Click on Import Keystore.

9. The BitBox02 details show up in the settings page for the first Keystore. You can give this device a unique label. The number stickers that come with your BitBox02 can help you keep the individual devices apart.

10. Next, click on Keystore 2, then click on Connected Hardware Wallet, and repeat the process for the second and third BitBox02.

11. After adding the last BitBox02, click on Apply in the lower righthand corner.

12. Now you can protect your Sparrow Wallet with a wallet password for your wallet, if you want. This is not required for security, because your funds are protected by the hardware wallets, but it helps protect your privacy.
Back up the wallet
To restore your wallet, you need to know all extended public keys. For our 2-of-3 wallet, its not enough to just have two of the hardware wallets. , Therefore, you should definitely create a backup file of your Sparrow multisig wallet. This file contains your extended public keys, but not your private keys, so you can keep it on your computer without worrying about security. If you set a wallet password to protect your privacy, you can even store it online.
To save your backup file, go to the Settings page and chose Export...

Sparrow offers many backup formats. Since we are using Sparrow Wallet in this guide, simply export the file as a Sparrow Wallet file and save it.
Receive coins

To create a receival address, you can click on the Receive tab and click on Display Address

The first time you create a receive address, the BitBox02 will register the multisig setup on the device. Chose a name for the setup and confirm that the xpubs (extended public keys) of all devices match the information shown on the Settings page.
The BitBox02 stores a checksum of the xpub keys of all other hardware wallets so that it can verify the receive address independently. This removes the possibliltiy of the software wallet giving you a different address controlled by an attacker.
After you have registered the setup, the BitBox02 will show you the receive address. Make sure to compare it to the address shown on your computer!
It is best to perform this step with all BitBox02 devices so that all devices can save the multisig setup. This is the only way to receive and send safely with all devices later on.
Sign and send a transaction
To send bitcoin, you need multiple signatures. Let's see how to do that:

- Open the Send tab, prepare a transaction, and then click on Create Transaction.

2. On the following screen, click on Finalize Transaction for Signing.

3. Click on Sign.

4. Plug in the first BitBox02, click on Scan... and unlock the BitBox02.
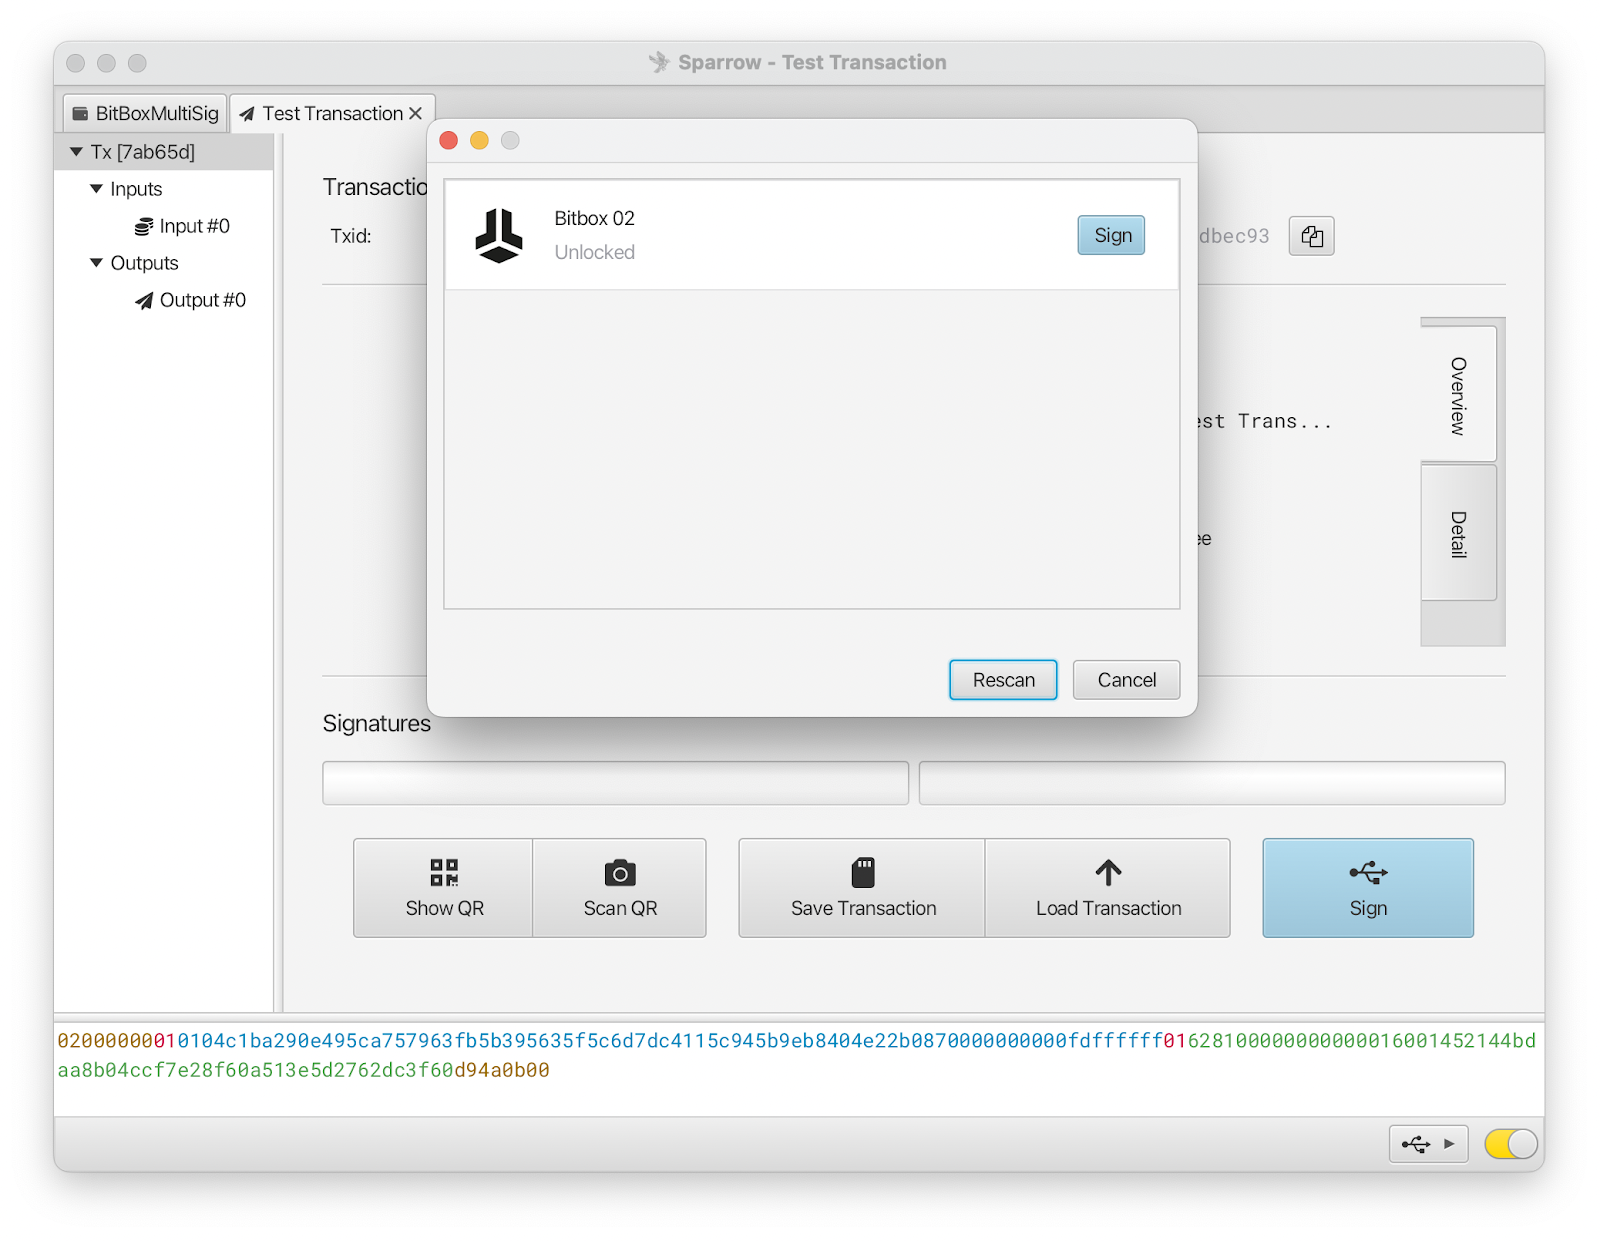
5. Click on Sign to send the transaction data to your BitBox02.

6. The BitBox02 displays the name of the multisig wallet you registered earlier. Check the transaction details on the secure screen of the BitBox, and if everything looks good, confirm it on your BitBox02. The first signature will show up in Sparrow Wallet. Click on Sign again and repeat this process for a second BitBox02.
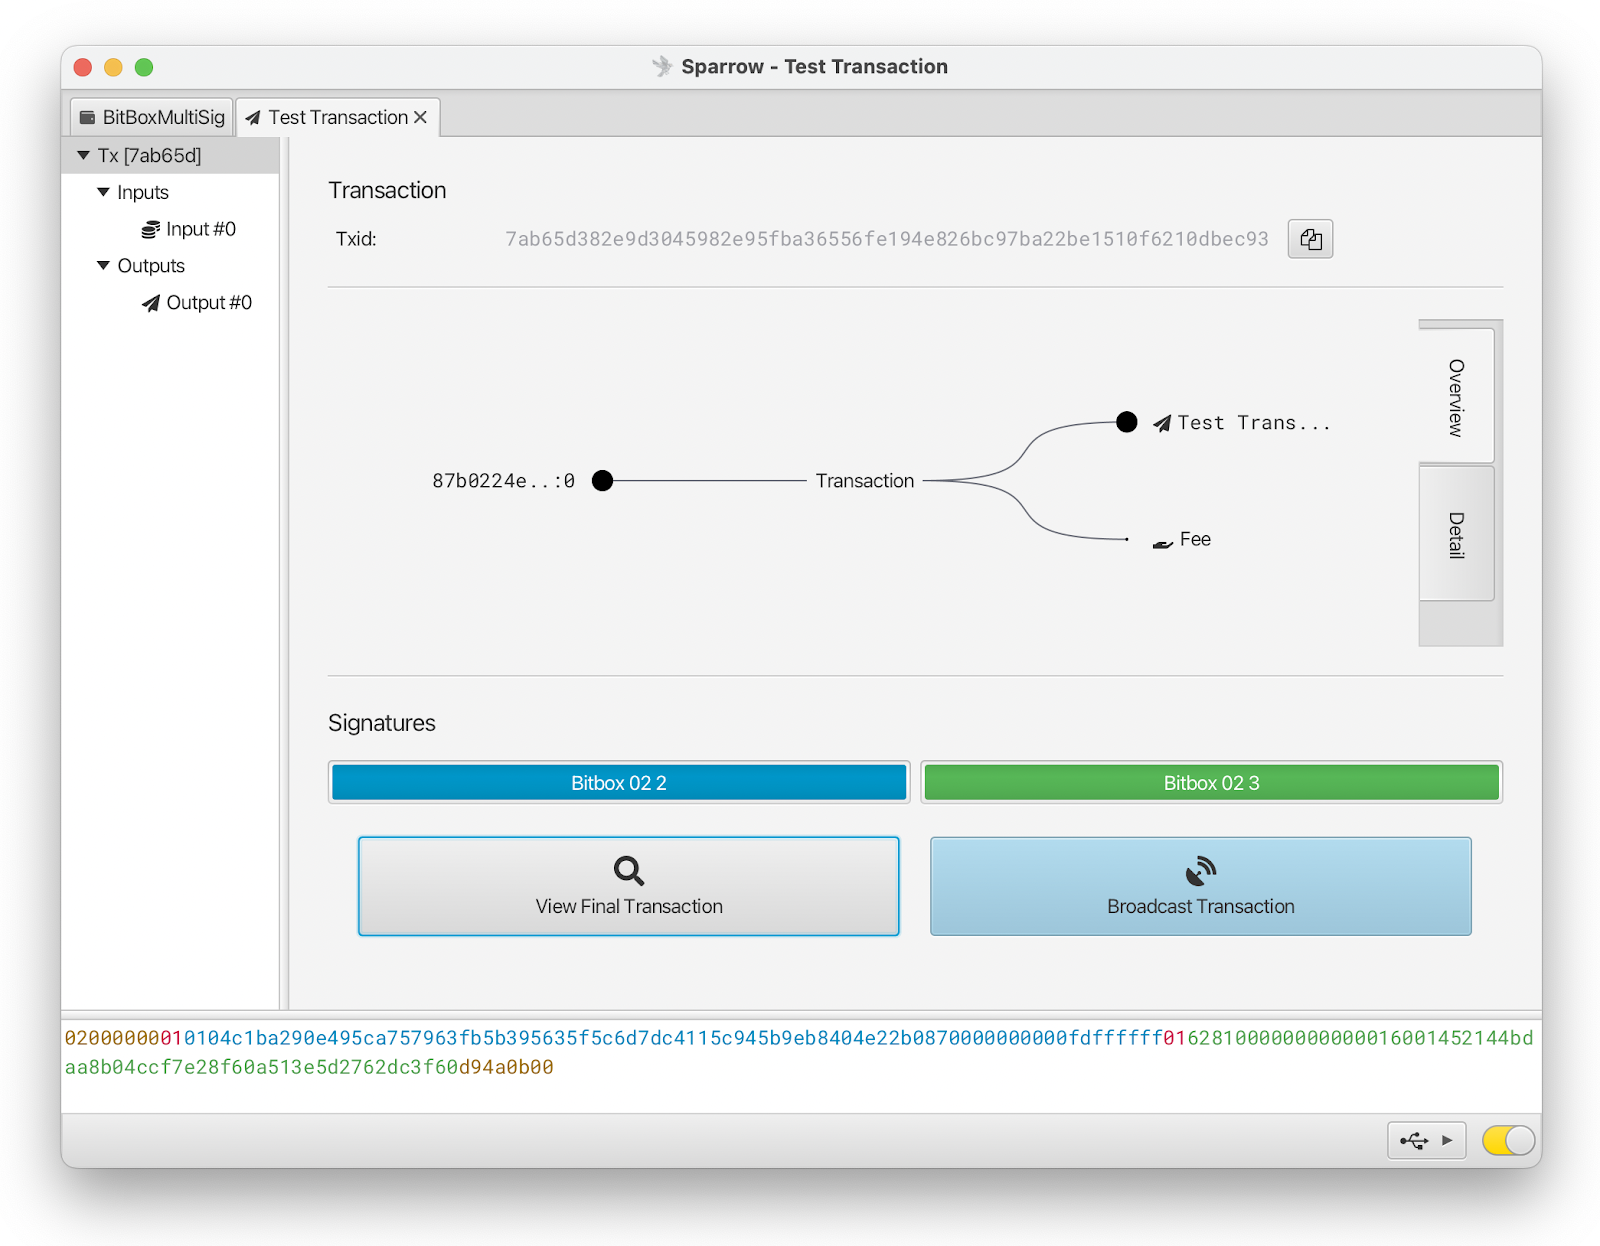
7. As soon as you have two signatures, you can click on Broadcast Transaction to send the signed transaction.
That's it, you now have a working multisig setup!
Frequently Asked Questions (FAQ)
What is a MultiSig wallet?
A multi-signature wallet is a type of bitcoin wallet that utilizes multiple signatures for a transaction. This means that a user can distribute a wallet over multiple hardware wallets, which requires a certain amount of hardware wallets to sign a single transaction. These types of wallets are usually used for ultra-high security applications, such as business accounts or wallets that are distributed between multiple people.
Should I create a MultiSig wallet?
Multi-signature wallets are considered an advanced feature of bitcoin wallets. If you are securing a lot of money and want redundancy in your security, you might want to look into it.
What are the risks of MultiSig wallets?
If you are not familiar with how multi-signature wallets work, you can easily mess up creating one. Not only do you have to write down all seed backups of the participating hardware wallets, you also need to note down the extended public keys, in order to restore the wallet.
Don’t own a BitBox yet?
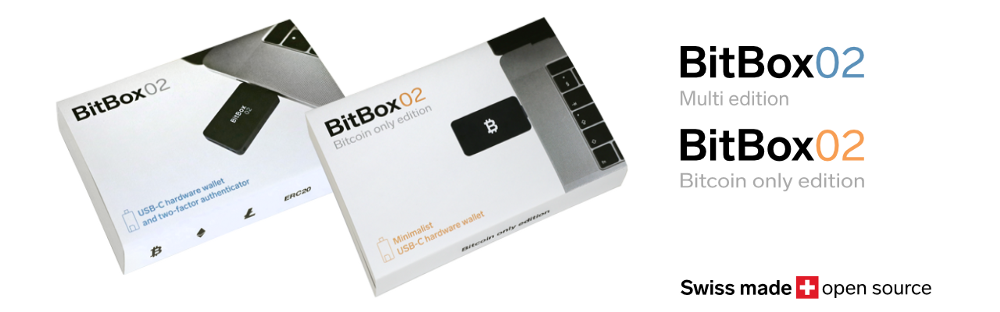
Keeping your crypto secure doesn't have to be hard. The BitBox02 hardware wallet stores the private keys for your cryptocurrencies offline. So you can manage your coins safely.
The BitBox02 also comes in Bitcoin-only version, featuring a radically focused firmware: less code means less attack surface, which further improves your security when only storing Bitcoin.
Shift Crypto is a privately-held company based in Zurich, Switzerland. Our team of Bitcoin contributors, crypto experts, and security engineers builds products that enable customers to enjoy a stress-free journey from novice to mastery level of cryptocurrency management. The BitBox02, our second generation hardware wallet, lets users store, protect, and transact Bitcoin and other cryptocurrencies with ease - along with its software companion, the BitBoxApp.